How to reduce photo file size on iPhone for email and upload forms
Published 1 October 2026 · 6 min read
To make a photo smaller on iPhone, reduce its pixel count: a 12 MP photo scaled to about 1280–2048 px on the long edge usually shrinks to a fraction of its size and still looks sharp on a screen. Without any app, you can use Mail’s image size option, crop in Photos, or build a Resize Image shortcut.
This guide is for the moment a photo is rejected for being too big — a portal that caps uploads at 1 or 2 MB, a bounced email, an upload that never finishes — and shows how to pick a size that’s just enough instead of shrinking it until it’s blurry.
Why are iPhone photos so large?
Recent iPhone cameras shoot 12 MP or more — around 4000 × 3000 pixels — and some models shoot 24 or 48 MP. A photo like that is usually a few MB, and detailed scenes or ProRAW files are much larger.
A phone or laptop screen, meanwhile, only shows about 1000–2500 pixels across. Most of the extra pixels matter only for large prints or heavy cropping. That is why lowering the resolution is the most effective way to cut the size, and changing the format is secondary.
How do I check how big a photo is?
- 1Open the photo in Photos.
- 2Tap the info button (the i in a circle) or swipe up on the photo.
- 3The panel shows the megapixels, pixel dimensions and file size.
Compare that number with the limit you’re working against. Many online forms state it plainly, such as “under 1 MB” or “JPG, 2 MB maximum”.
What size should I shrink a photo to?
Choose by where the photo will be seen, not by what the camera shot:
- ID documents and form photos: about 800–1280 px on the long edge is usually enough to read the text and fits a 1 MB limit.
- Email, documents, websites: about 1280 px is a good balance.
- Viewing on a computer, family albums: about 2048 px still looks sharp on a big screen.
- Printing, or cropping later: keep the original.
If text on a document looks smudged after shrinking, go up one size rather than compressing harder.
How do I make photos smaller when sending with Mail?
The iPhone’s Mail app has a built-in option to shrink attached photos:
- 1In Photos, select the photos, tap Share and choose Mail.
- 2Fill in the recipient and subject as usual.
- 3Find the image size line near the top of the message (or the prompt that appears when you tap Send, depending on the iOS version) and pick Small, Medium or Large instead of Actual Size. Mail shows an estimated size for each.
- 4Send the message.
Tip: send that email to yourself and save the attachments, and you have small copies to reuse elsewhere, such as an upload form.
Does cropping reduce a photo’s file size?
Yes. Cropping away what you don’t need removes pixels, so the file gets lighter — and a document photo gets easier to read.
- 1Open the photo, tap Edit and choose the crop tool.
- 2Drag the corners to keep only what matters, such as just the sheet of paper.
- 3Tap Done.
Note that Photos saves the change on that photo (you can still undo it with Edit › Revert). To keep the full version, tap Share › Duplicate before cropping.
How do I resize many photos at once with Shortcuts?
For more than a handful, a shortcut does the work for you:
- 1Open Shortcuts and tap + to create a new shortcut.
- 2Add the Resize Image action and enter a width, for example 1280.
- 3Add Convert Image if you need JPEG; it has a quality slider.
- 4Add Save to Photo Album.
- 5In the shortcut’s settings, turn on Show in Share Sheet, then run it from the Share button in Photos.
Action names can differ slightly between iOS versions. The result is a new photo; the original stays as it was.
Where does Minivid help?
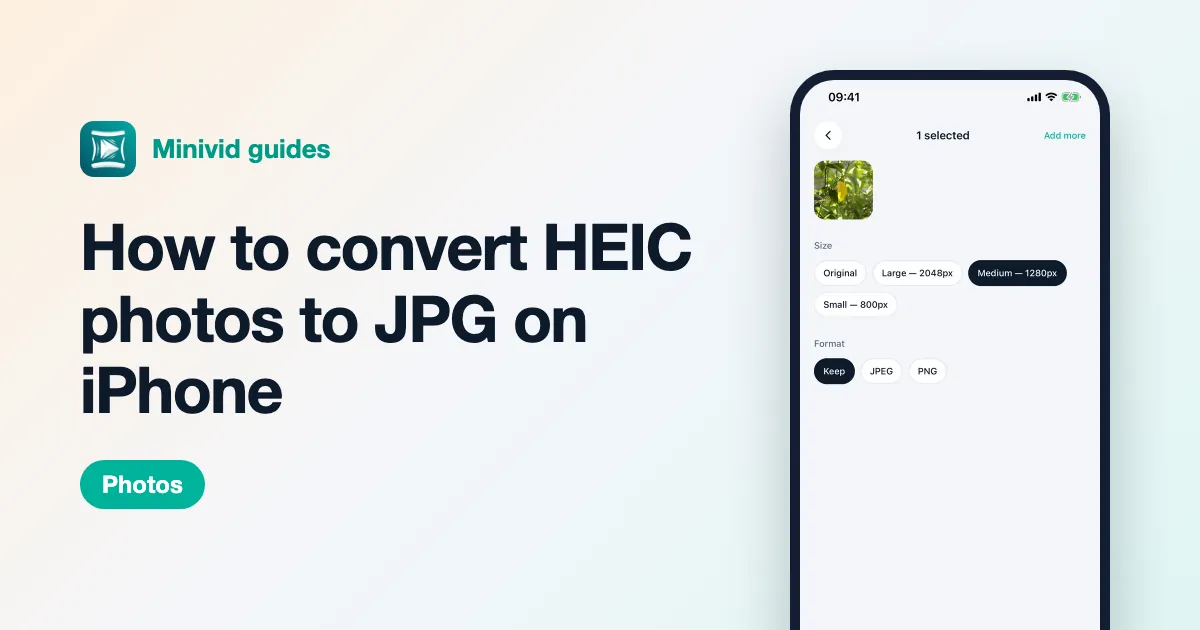
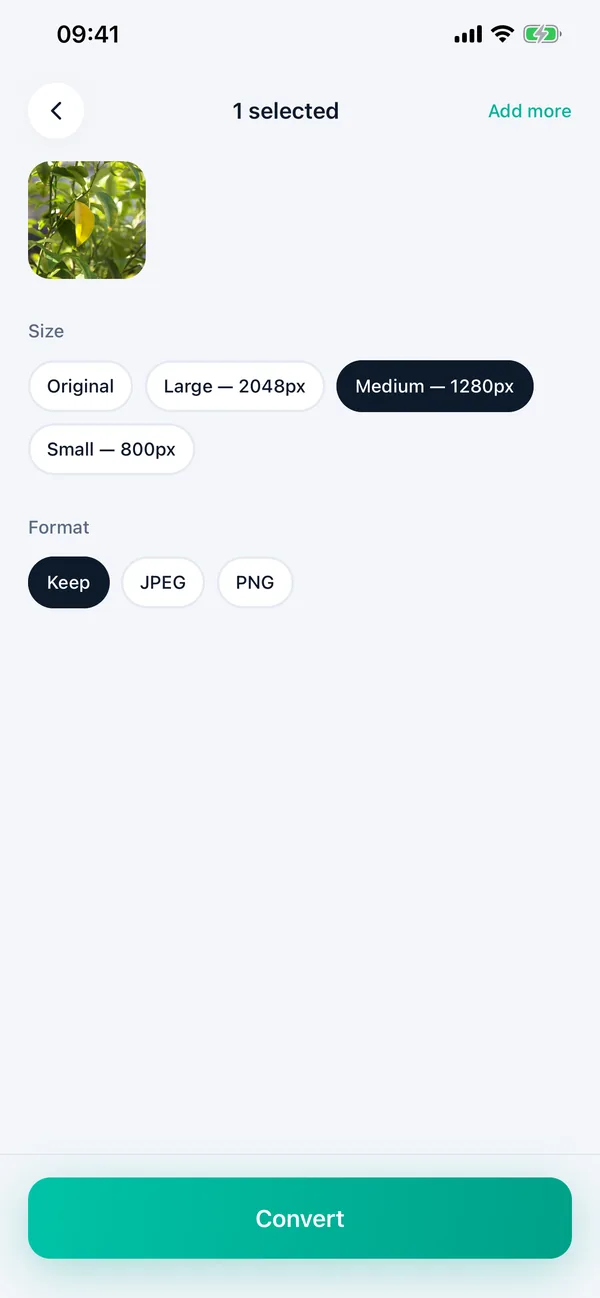
Minivid’s Convert & resize photos tool is free and puts this on one screen. Pick a batch of photos, choose a Size — Large (2048 px), Medium (1280 px) or Small (800 px) — and, if the form only takes JPG, set Format to JPEG. Tap Convert, then save them all to Photos or share them directly.
The new photos keep the original’s date and location, so they stay in the right place in your timeline, and the originals aren’t touched. Everything runs on your iPhone and nothing is uploaded — worth having when the photo is an ID document. Minivid doesn’t let you type an MB limit for photos, so pick a size step and check the result as shown above.
Want to know the size before you compress?
Minivid compresses video on your iPhone and shows the final size before it starts. Your videos are never uploaded.